sf6vid: a CLI tool to hide usernames in game play, written in Go
software developer && gamer passionate about software development && games ... catch my twitch streams on twitch where I stream: https://twitch.tv/techygrrrl
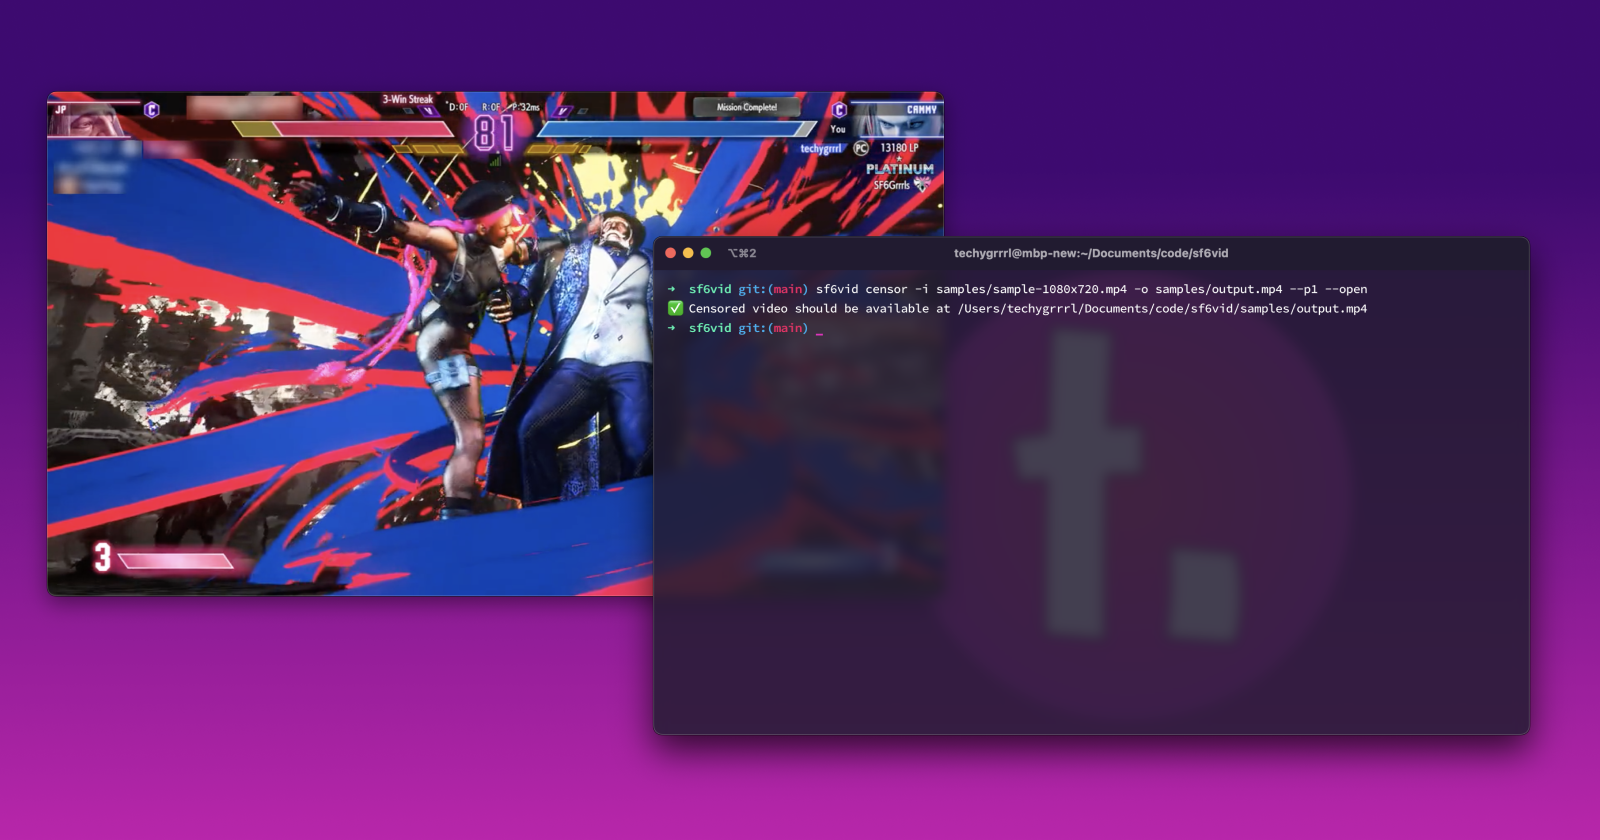
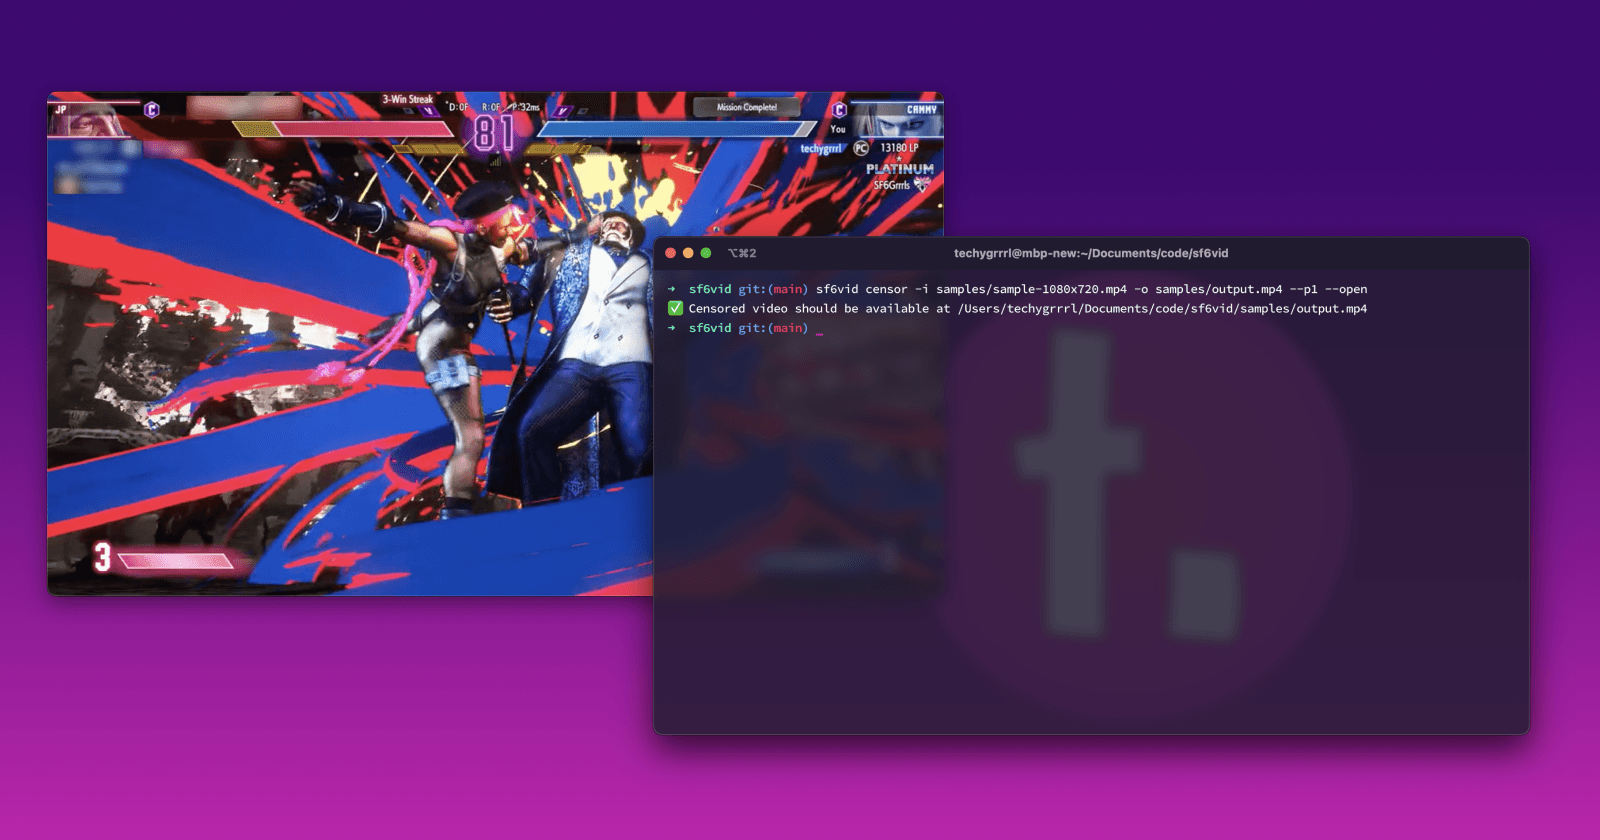
sf6vid is a command line tool that allows you to censor player data in a Street Fighter 6 game play video.
How it works
sf6vid is a command line tool. In order to use it you need to install it and execute the file from your terminal.
In the future there may be a graphical user interface tool to make it easier for everyone to use, but for now it's offered as a CLI tool.
Sample video output
Pixelize blur effect
Pixelize is a new blur filter, supported in ffmpeg 6+. This is the default.
Box Blur
Box blur is the original blur effect, supported in ffmpeg 4+. This can be enabled and customized with extra flags.
Download
You can download the latest release from the releases page and put it somewhere on your path, or, if you have Go tooling installed, run the following:
go install github.com/techygrrrl/sf6vid@latest
To install a specific version, you can do the following:
go install github.com/techygrrrl/sf6vid@0.2.1
You can read the documentation here.
You can also watch a video walkthrough about this tool.
Why I built sf6vid
I built sf6vid so I can share videos of my game play without exposing the other player of the footage, for the following reasons:
I do something pretty cool and want to share a video on TikTok or Discord and I don't want to share the player information. Often it is superfluous information, and sometimes, depending on the game play, it could be embarrassing to them, so I wouldn't want to make someone feel bad who was just doing their best to play an honest game
In order to comply with a certain online forum's rules for hiding opponent data, should I ever post there, though their moderation team enforces this quite selectively and poorly currently
I found myself doing this manually and not really enjoying the video software I tried using:
iMovie, which is installed on macOS by default and is only available for macOS, doesn't have this functionality. I would have to overlay a static image over sections I'd want to hide, and they only have the ability to overlay one image at a time. If I wanted 3 boxes I'd have to process the video 3 times, applying a new image each time.
OpenShot is a free, open-source, cross-platform video editor. It has the functionality built in that I wanted to do, including a nice pixel block effect. Unfortunately, I find this software cumbersome to use. There are some tool panel layout issues I did not like, and I found that my output had unexpected transitions that I did not intend to add (where it would animate from a giant box, slowly for several seconds into a small box). I had no idea how to remove this transition after adding the effect without deleting the effect and starting over. It was quite a lot of trial and error but I eventually learned the quirks of how this worked.
How I built sf6vid
Tools I used
sf6vid was built using the following tools:
Go programming language (version 1.20)
Figma, to help calculate the size and positioning of the censor boxes
ffmpeg, which does all of the heavy lifting
cobra, for building command line utilities (e.g. bootstrapping commands, parsing flags and arguments, etc.)
testify, an assertions library that makes unit testing more enjoyable in Go
Calculating the censor boxes
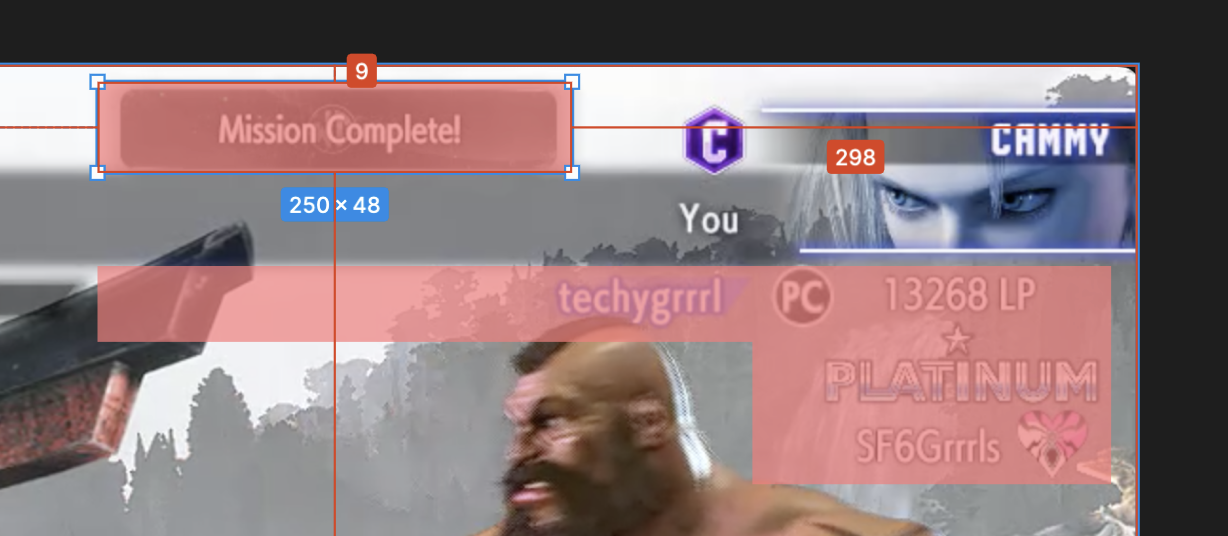
There are 3 censor boxes for each side:
Username, e.g. techygrrrl
Title (above the health bar), e.g. "Mission complete"
Rank and club name, e.g. Platinum 1 and SF6Grrrls
In order to calculate the censor boxes, I took a screenshot of some game play and drew each of these rectangles on it.

Figma has some great tools for being able to see width, height and x/y positioning of an element. This tool makes front-end development much easier than the olden days of looking at a rasterized image or a PDF, but it can also help with video editing.
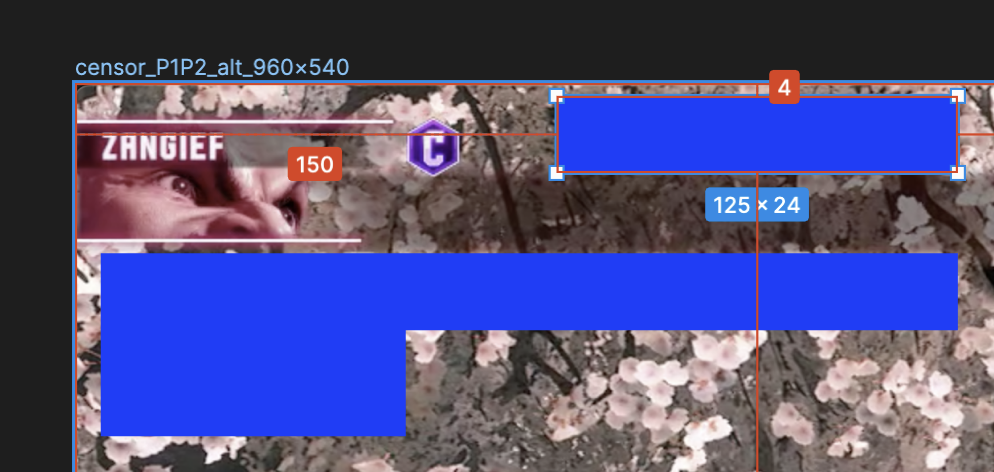
I used this information to help create the data structures I'd end up using, and making sure my calculations for the boxes on each side were correct. Given that a user could have a large video or a small video, it was important that this was handled correctly, and so being able to see it visually really helped confirm that the math was correct for videos of various sizes—I designed for 1920x1080 and 960x540.
If you're curious about the math behind it, you can check out the video_math.go file.
This video math was also a very good candidate for test-driven development (where you write your unit tests first, including expected output given specific input). I did test-driven development in Go to gain confidence in my box sizing and positioning before even trying to pass any values to ffmpeg. See the video_math_test.go file to see the tests.
Using ffmpeg
Using ffmpeg was definitely the hardest part of this task. Working with their filter API is not easy or welcoming to newcomers. I did get some help from several smart people in my Twitch streaming community.
If you wanted to learn more about the code for the ffmpeg commands, check the following files in the project: ffmpeg.go, ffmpeg_test.go.
Using cobra
The cobra CLI is the tool I used to bootstrap the sf6vid CLI tool. The code for that can be found in the cmd directory of the project but the important code is the censor.go file which is the entry point for the sf6vid censor command, the main (and currently only) command the tool has.
Read the code or contribute
If you are looking for a project to contribute to, and working with ffmpeg is interesting to you, this one might appeal to you. Here are some things we could use help with:
Support for Windows
Documentation for installing on Windows manually
Adding support for opening the video file after processing on Windows
Support for Linux
- Adding support for opening the video file after processing on Linux
You can see the sf6vid repository on Github.